Do you want to add front-end login feature to your WordPress site? Sending users to the default login page usually redirects them to the WordPress admin area. This is very confusing and is bad for user experience. Wouldn’t it be nice if users can login to your WordPress site directly from the front-end? In this article, we will show you how to add a front-end login page in WordPress.
Why and When You Need Front-end Login in WordPress?
By default, WordPress sends users to their profile page in WordPress admin area when they sign in. Now if there is something they can do in the admin area, like writing a post, then it is understandable.
However, in case of WordPress membership sites, all your users don’t need access to the dashboard. In fact, many users will probably feel a bit confused after login.
Allowing users to login from the front-end of your website will improve user experience. Users will be able to continue doing what they wanted to do.
Having said that, let’s see how you can add a frontend login page or a widget in WordPress.
Adding Frontend Login in WordPress
First thing you need to do is install and activate the Theme My Login plugin.
Upon activation, the plugin will create pages for login, logout, forget password, and registration.
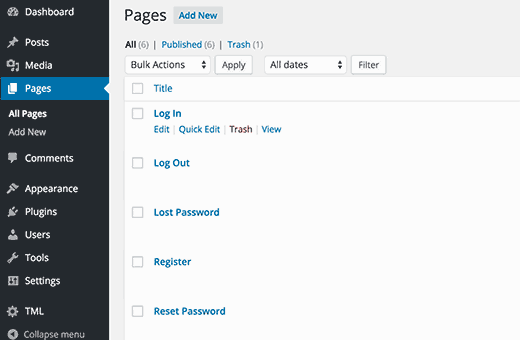
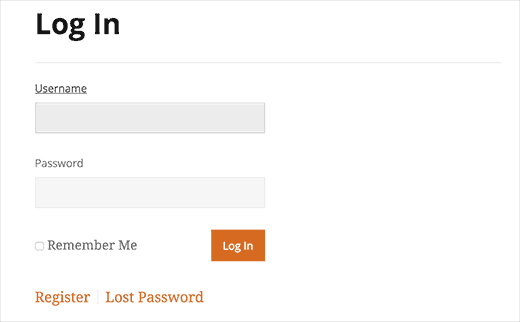
You can simply visit these pages in your browser to see these forms in action.
Theme My Login works out of the box, but you can also adjust the plugin settings to meet your needs. Simply visit TML page in admin area to configure plugin settings.
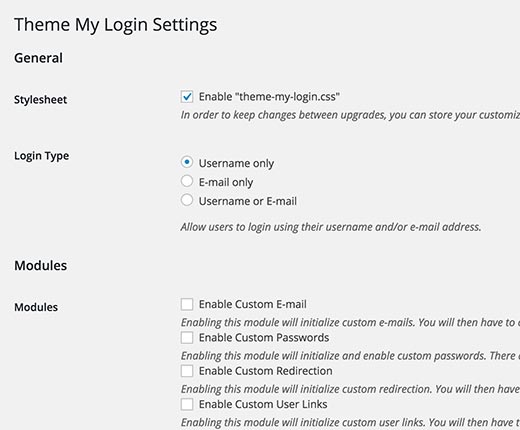
The first option allows you to load plugin’s default stylesheet. If you are having trouble with the display of forms on your website, then you can uncheck this option.
Theme My Login can also allow your users to login with email address, username, or both.
Theme My Login Modules
Theme My Login comes with different modules packed right into the plugin. You can enable them based on your own requirements. Simply check the module you want to enable.
Once you save the plugin settings, you will notice a settings page added under the TML menu for each module you enable.
Let’s take a look at what each module does and how to use them.
1. Custom Email
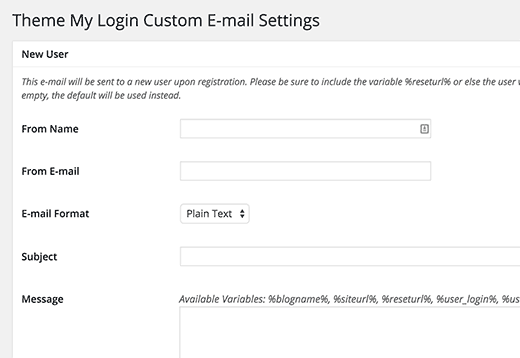
This module allows you to change emails sent by WordPress to users and site admins. After enabling this module you can customize email messages by visiting TML » Email tab.
If you are having trouble sending or receiving WordPress emails, then check our guide on how to fix WordPress not sending email issue.
2. Custom Passwords
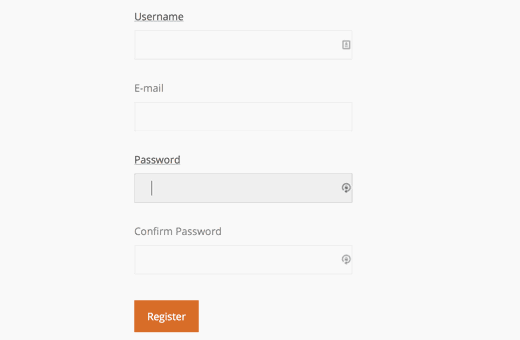
By default WordPress sends users an email asking them to visit your website to complete registration by setting up a password. By using custom passwords module you can allow users to choose a password during registration.
This module does not have a settings page. Enabling it will simply add password fields to the registration form on your website.
3. Custom Redirection
By default when a user logs in, WordPress sends them to their profile page in the admin area. Custom redirection module allows you to change this behavior.
After enabling this module you need to visit TML » Redirection to set up your settings.
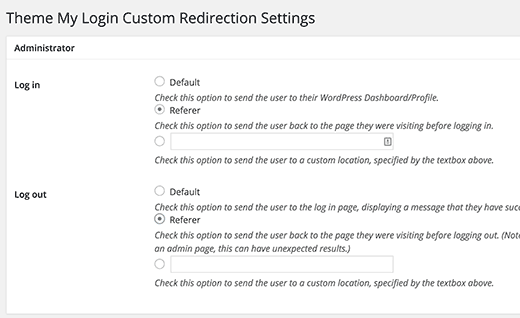
The plugin allows you to configure redirection for each user role on your site. This means you can set different rules for an Administrators, author and other user roles.
There are three options for both login and logout redirects. You can choose the default WordPress behavior which will send users to their profile or login page. You can choose Referer, which will send users to the page they came from. Lastly, you can choose “custom” which send users to a specific URL when they login or logout.
4. Custom User Links
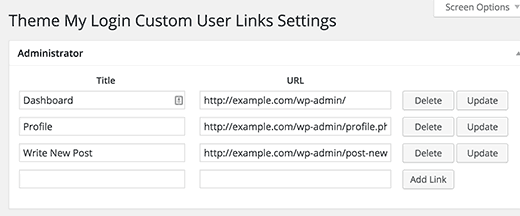
This module allows you to add custom links for users. These links will be shown in Theme My Login widget. After enabling this module, you need to visit TML » Custom Links tab to edit links.
5. Recaptcha
As the name suggests, this modules allows you to show recaptcha on registration pages. After enabling it, you need to visit TML » reCAPTCHA tab to configure it.
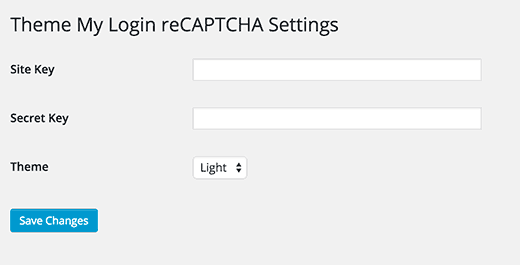
Simply enter your site key and secret key and click save changes. You can generate site key and secret key by visiting the reCAPTCHA website.
6. Security
This module allows you to improve the security of your login pages. After enabling it, you need to visit TML » Security to configure the settings.
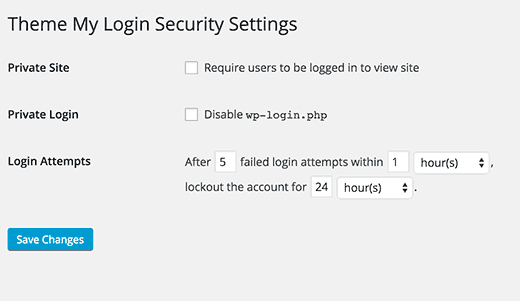
You can make a website completely private by forcing users to login before they can view the site. You can also disable access to wp-login.php file. Lastly, you can limit login attempts to protect your site from brute force attacks. Take a look at our guide on why you should limit login attempts in WordPress to learn more.
7. Themed Profiles
Themed profiles module allows users to edit their profiles on the front-end. After enabling this module, you need to visit TML » Themed Profiles tab to configure it.
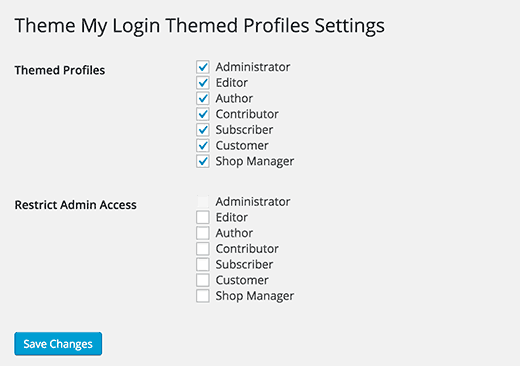
Simply select the user roles for themed profiles and user roles with access to wp-admin directory.
8. User Moderation
Opening user registration on a site means that you will have to deal with spam user registrations.
Theme my login makes it easier to combat spam registration with user moderation module. After enabling this module, you need to visit TML » Moderation to configure it.
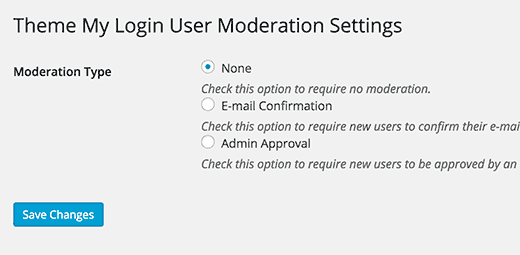
You can choose between email confirmation method or require each registration to be manually approved by an administrator.
Adding Frontend Login Form in WordPress Sidebar Widget
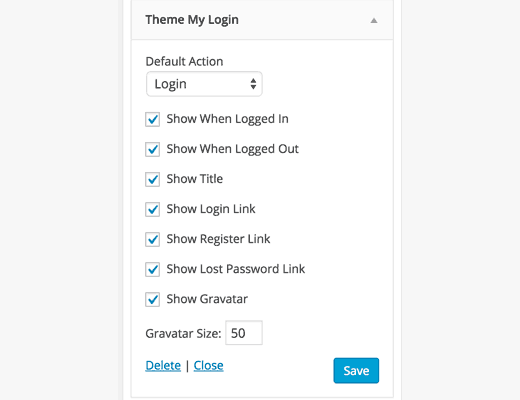
Apart from creating the login, registration, and password reset pages, Theme My Login also comes with a handy widget. You can add this widget to a sidebar and allow users to login from anywhere on your site.
Simply go to Appearance » Widgets and add Theme My Login widget to a sidebar.
That’s all, we hope this article helped you add front-end login page and widget in WordPress. You may also want to see our list of 21 plugins to efficiently manage WordPress multi-author blogs.
If you liked this article, then please subscribe to our YouTube Channel for WordPress video tutorials. You can also find us on Twitter and Facebook.
The post How to Add Front-End Login Page and Widgets in WordPress appeared first on WPBeginner.
Source: WP Beginner
