
Although more prominent features like Night Shift and a few new Quick Actions are getting the spotlight with the launch of iOS 9.3, one new lesser-known update is definitely worth checking out. In iOS 9.3, Apple has improved the functionality of its first-party Notes app with the ability to add password or Touch ID security for individual notes.
The feature allows users to prevent access to sensitive information on a case-by-case basis (some notes, like a shopping list, might not be as high risk), just in case someone gets past the lock screen security of the iPhone itself. With some people even using Notes to store passwords for various sites and services, Apple’s security-enhanced update is well worth checking out.
Creating a Password in Notes on iOS
The steps needed to set up a password or Touch ID for your Notes are straight-forward and should only take a few moments to complete.
- Navigate to the Settings app on your iPhone or iPad.
- Scroll down to “Notes” and tap on it.
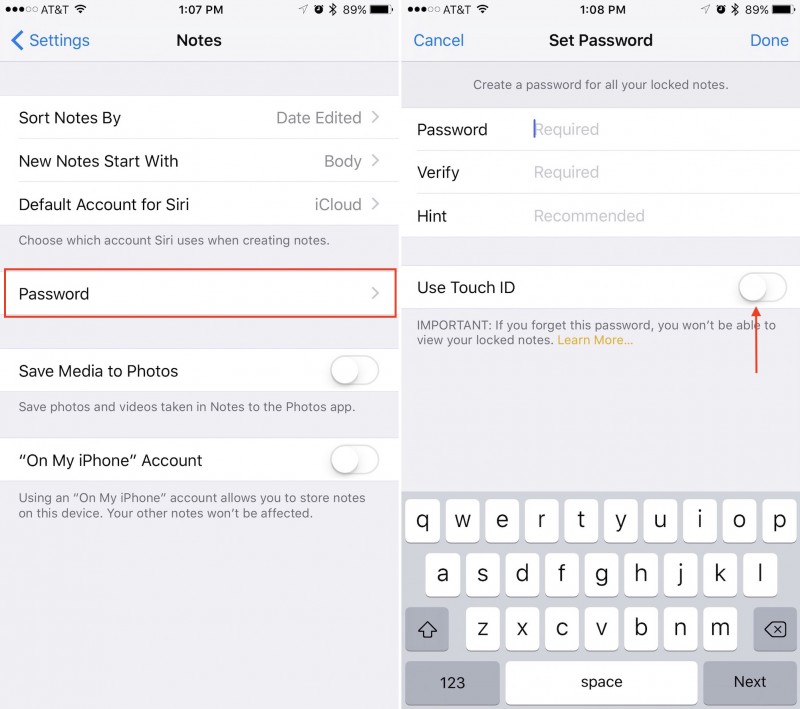
- Midway down the screen will be a “Password” option. Tap on it.
- If this is your first time setting it up, a menu will immediately appear asking to set up the new password.
- Fill out the fields requiring the Notes password (remember that something other than your iPhone passcode will be preferable), and then verify the password in the next field.
- Provide a hint to the password you entered to ensure that if you ever forget it you can be guided back through guessing.
- In the same menu, toggle on “Use Touch ID.”
- Tap “Done” in the top right corner to confirm your selections.
To test out the new password and Touch ID features of Notes, head over to the Notes app on your iPhone or iPad. There are just a few more steps to go through to fully protect a note of your choice from prying eyes.
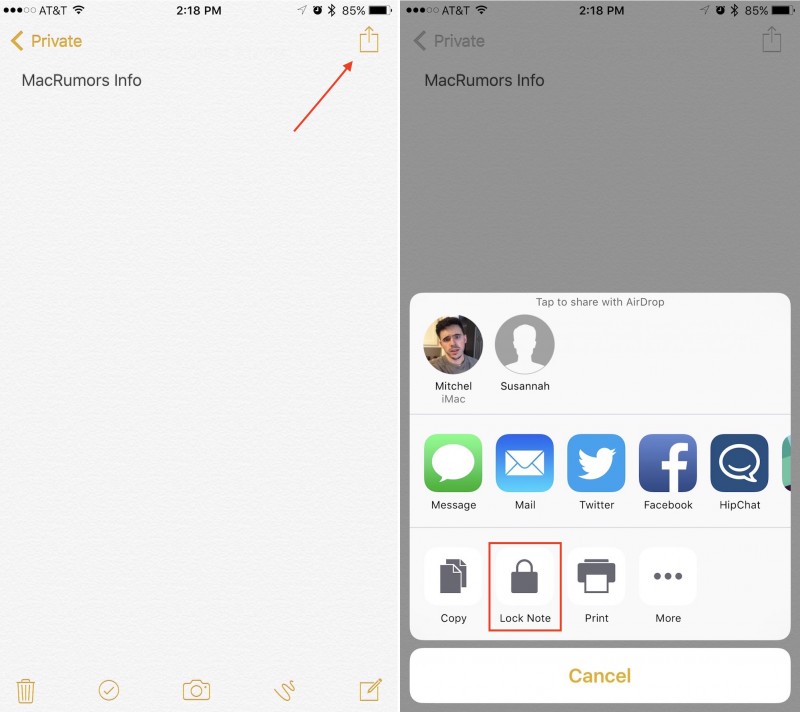
- Once inside Notes, if you’ve already got a particular note in mind to protect, skip to the next step. Otherwise, tap on the bottom right of the app to create a new Note, and enter any private information you wish to hide.
- Inside the note, tap on the top right of the screen to bring up the share menu. Tap the “Lock Note” option in the bottom row.
- If you haven’t entered the Notes password recently, the app will ask for the password or Touch ID fingerprint you created in the Settings menu. Comply by providing either measure of security. If no password or fingerprint is required, the lock will be added automatically.
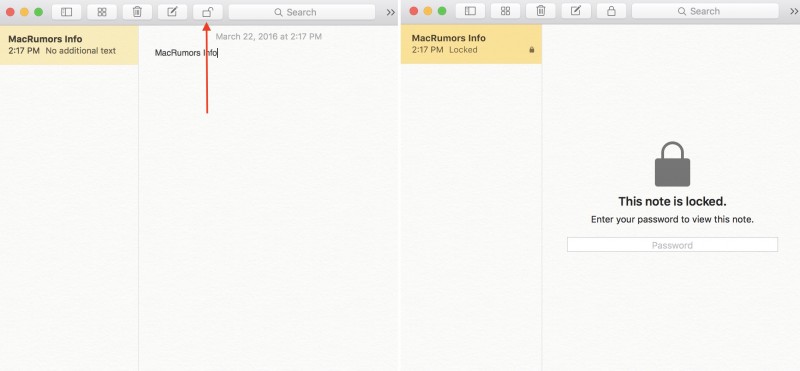
- This adds a lock to the note, but doesn’t actually lock it yet. To do that, click on the new unlocked button on the top right of the screen.
- The note should now be hidden with a simple “This note is locked” message.
- To view the locked note again, simply tap “View Note” and place your finger on the Home Button to use Touch ID, or enter your password.
Using a Password in the OS X Notes App
Alongside the iOS 9.3 update, Apple’s OS X 10.11.4 introduces similar support for password-protected Notes for the company’s desktop operating system. The password setup process carries over from the iOS installation, but you’ll have to ensure that Notes are syncing with iCloud to properly use the password feature on a Mac.
- Navigate to System Preferences.
- Click on iCloud.
- Scroll until you see “Notes” and make sure the box is checked.
From here, any changes made to your Notes on iOS — from their content to the locked/unlocked status — should be reflected on the Mac. Of course, Apple’s desktops and laptops don’t have Touch ID, so if you want to unlock a Note away from your iPhone, you’ll have to enter the password into the app.
At any time you can change or turn off the password in Notes by revisiting the Settings iOS app, navigating back through the Notes, then Password submenus, and following either the “Change Password” or “Reset Password” buttons.
There are plenty of other neat features that debuted in both iOS 9.3 and OS X 10.11.4, so check out MacRumors‘ recent coverage of each for more information.
Discuss this article in our forums
Source: MAC ROUMORS