
I’ve been learning Swift recently and now that it’s Open Source, I’m looking at using it on my Linux server.
Firstly however, I wanted to run it within a Vagrant box locally and as I provision all my boxes via Ansible, I created a simple playbook and am recording it here in case its useful to anyone else!
The installation instructions are easy to follow, so I simply replicated them as a set of actions. Note that the filename of the latest snapshot has the version and date included into it, so I created those as variables so that I could change them and just re-provision.
I usually run Ansible on my Vagrant VM directly as this means that I don’t need it installed locally and that my boxes are usable by people who have Windows. Hence, I use the shell provisioner to install Ansible first and then run the playbook. These are the files I use:
Vagrantfile:
Vagrant.configure("2") do |c|
  c.vm.define "swiftdev", primary: true do |config|

    config.vm.box = "ubuntu/trusty64"
    config.vm.network "private_network", ip: "192.168.99.202"
    config.vm.hostname = "swiftdev.localhost"

    # Prevent Vagrant 1.7 from asking for the vagrant user's password
    config.ssh.insert_key = false

    # Install ansible on guest & run playbook
    config.vm.provision :shell,
      :keep_color => true,
      :inline => <<SCRIPT
        if [ $(dpkg-query -W -f='${Status}' ansible 2>/dev/null | grep -c "ok installed") -eq 0 ];
        then
            export DEBIAN_FRONTEND=noninteractive

            echo "Add Ansible repository"
            apt-add-repository ppa:ansible/ansible &> /dev/null || exit 1
            apt-get update -qq

            echo "Installing Ansible"
            apt-get install -qq ansible &> /dev/null || exit 1

            echo "Runing apt-get upgrade"
            apt-get update -qq &> /dev/null || exit 1
            apt-get upgrade -y &> /dev/null || exit 1
        fi


        echo "Running Ansible playbook"
        export PYTHONUNBUFFERED=1
        export ANSIBLE_FORCE_COLOR=1
        su vagrant -c "ansible-playbook -i 127.0.0.1, --connection=local /vagrant/vm-provisioning/init.yml"

SCRIPT

  end
end
Notice that I run the init.yml playbook as the vagrant user so that the correct home directory is used. This is the main playbook:
vm-provisioning/init.yml:
---
- hosts: all

  vars:
    swift_version:       "2.2"
    swift_snapshot_date: "2015-12-10-a"

  tasks:
    - name: Install useful packages
      apt: pkg={{ item }} state=latest
      with_items:
        # - curl
        - vim
      sudo: yes

  include: swift.yml
This doesn’t do much. It sets the variables for the swift snapshot that we want and also installs vim and curl as they are always useful!
Finally, we then install Swift itself into our home directory:
vm-provisioning/swift.yml:
---
- hosts: all
  tasks:
    - name: Create swift directory
      file: path=~/swift state=directory owner=vagrant group=vagrant

    - name: Install packages for swift
      apt: pkg={{ item }} state=latest
      with_items:
        - clang-3.6
        - libicu-dev
      sudo: yes

    - name: Use clang 3.6
      alternatives: name=clang link=/usr/bin/clang path=/usr/bin/clang-3.6
      sudo: yes

    - name: Use clang++ 3.6
      alternatives: name=clang++ link=/usr/bin/clang++ path=/usr/bin/clang++-3.6
      sudo: yes

    - name: Grab gpg keys
      shell: gpg --keyserver hkp://pool.sks-keyservers.net --recv-keys '7463 A81A 4B2E EA1B 551F  FBCF D441 C977 412B 37AD' '1BE1 E29A 084C B305 F397  D62A 9F59 7F4D 21A5 6D5F'
      args:
        chdir: /home/vagrant

    - name: Refresh gpg keys
      shell: gpg --keyserver hkp://pool.sks-keyservers.net --refresh-keys Swift

    - name: Create swift directory
      file: path=~/swift state=directory owner=vagrant group=vagrant

    - name: Download Swift snapshot
      get_url: >
        url=https://swift.org/builds/ubuntu1404/swift-{{ swift_version }}-SNAPSHOT-{{ swift_snapshot_date }}/swift-{{ swift_version }}-SNAPSHOT-{{ swift_snapshot_date }}-ubuntu14.04.tar.gz
        dest=~/swift/swift-snapshot.tar.gz
        mode=0444
        owner=vagrant

    - name: Download Swift snapshot signature file
      get_url: >
        url=https://swift.org/builds/ubuntu1404/swift-{{ swift_version }}-SNAPSHOT-{{ swift_snapshot_date }}/swift-{{ swift_version }}-SNAPSHOT-{{ swift_snapshot_date }}-ubuntu14.04.tar.gz.sig
        dest=~/swift/swift-snapshot.tar.gz.sig
        mode=0444
        owner=vagrant

    - name: Verify snapshot file
      command: gpg --verify swift-snapshot.tar.gz.sig swift-snapshot.tar.gz
      args:
        chdir: ~/swift

    - name: Remove current version
      shell: rm -rf usr
      args:
        chdir: ~/swift

    - name: Extract archive
      shell: tar xzf swift-snapshot.tar.gz --strip-components 1
      args:
        chdir: ~/swift

    - name: Update bashrc
      lineinfile:
        dest=~/.bashrc
        line='export PATH=~/swift/usr/bin:"${PATH}"'
        regexp="^export PATH=~/swift/usr/bin"
        owner=vagrant
        state=present
        insertafter=EOF
        create=True
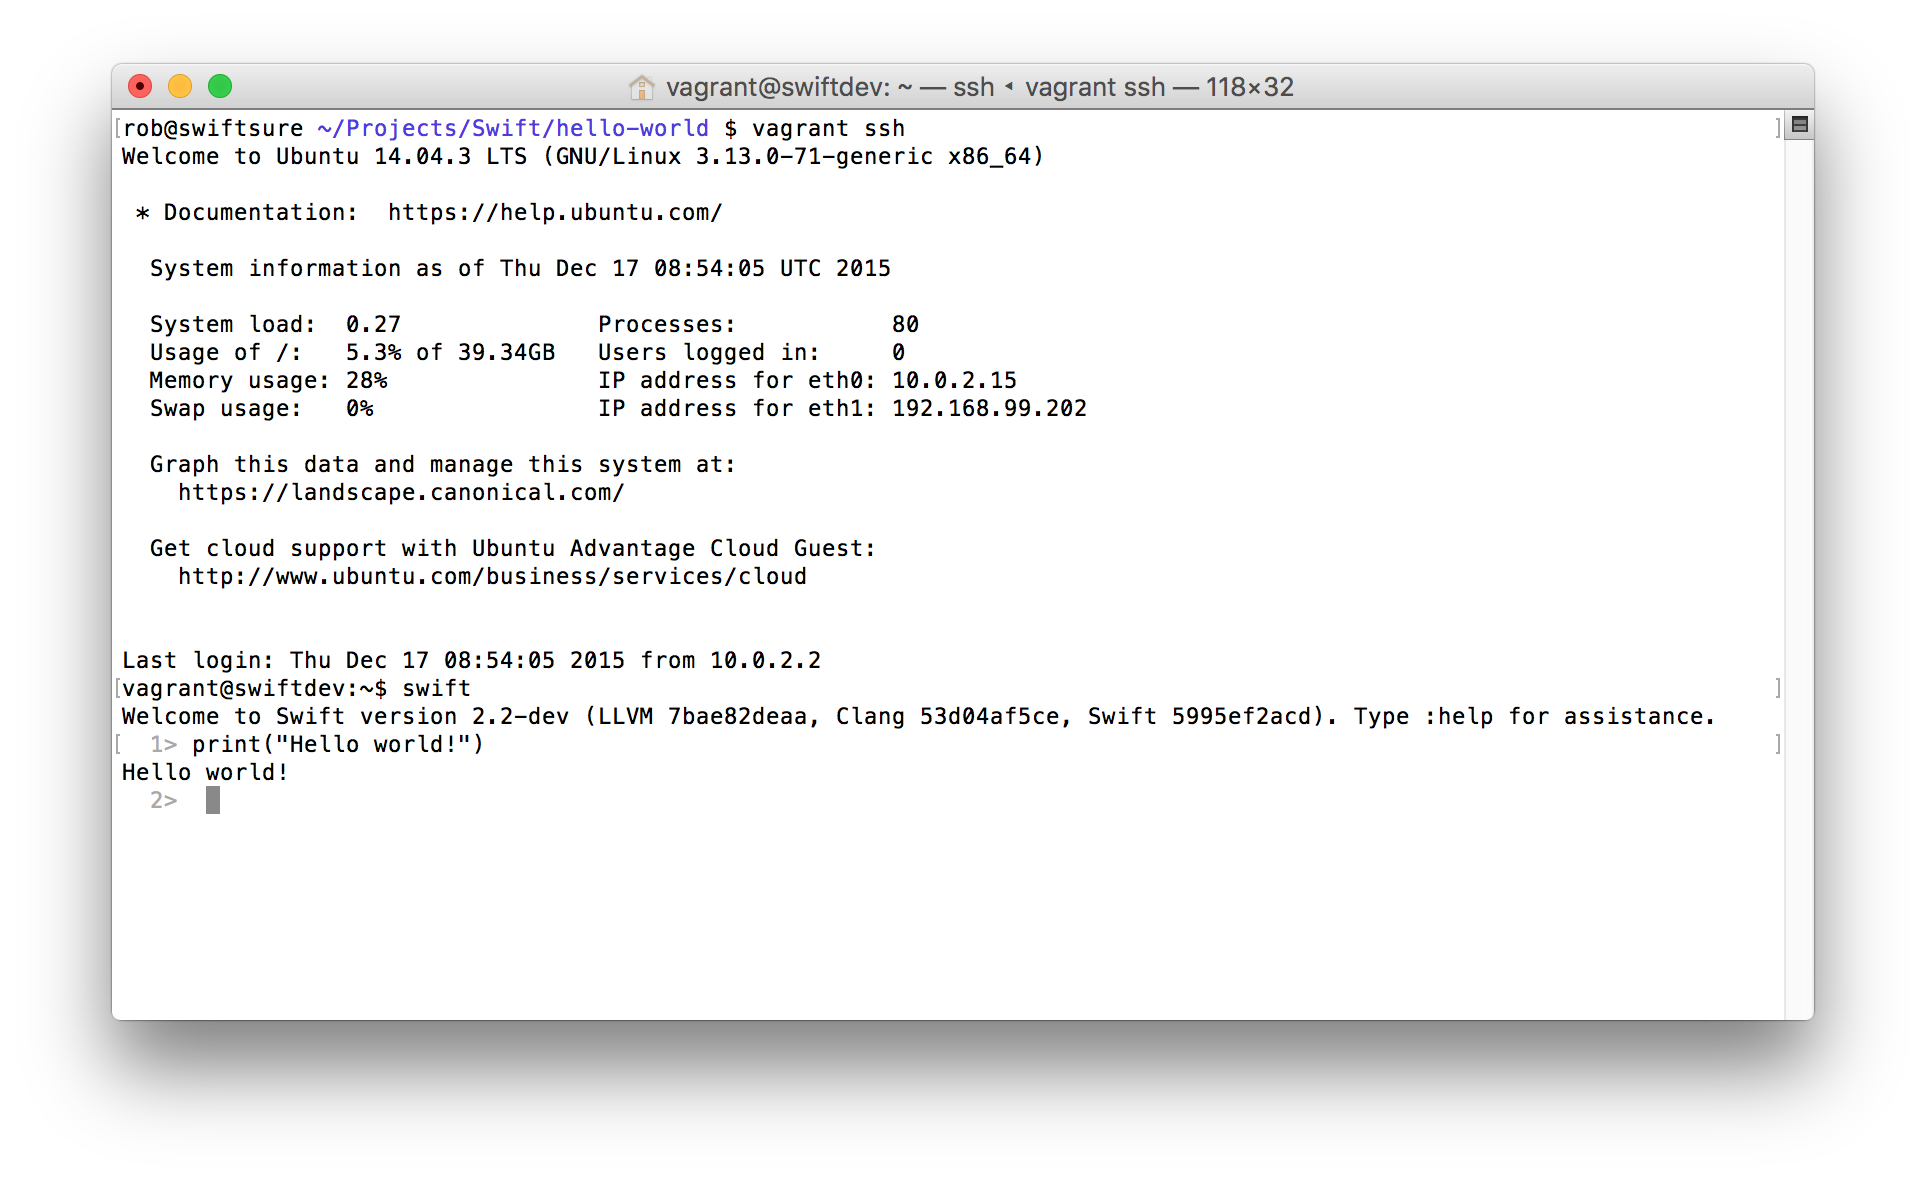
That’s it. You can now vagrant ssh into the VM and run swift on the command line:
Source: AKRABAT